User Guide
The leak survey manager app allows operation managers to assigning survey areas to field crews and sketching in temporary surveys. Try the app using the sample data and user guide below.
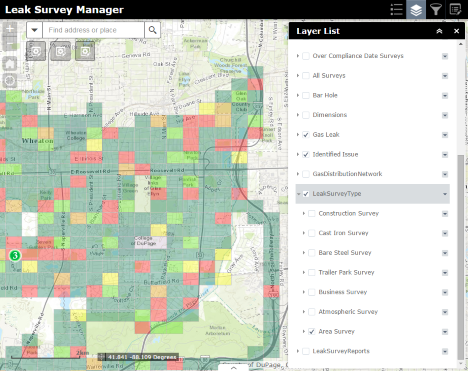
View surveys by type and due date
The layer list has been set up to display the surveys by type and by due date. You can toggle between the different types using the table of contents.
- Sign in to your ArcGIS organization.
- Browse to the Leak Survey Manager app and open it in a browser.
- Expand the layer list widget.
- Turn off Survey Reports and turn on the Survey Types.
- Expand the Survey Types and select a survey type.
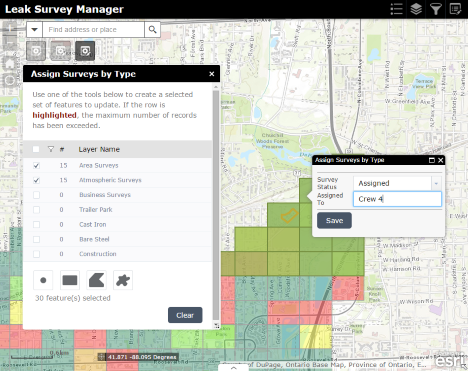
Batch assign leak surveys
The Batch Attribute Editor widget allows you to update common fields for features in multiple layers. Use this tool to select a set of grids and change their status.
- Open the Assign by Type widget.
- Enable or disable the type of survey you want to assign.
- Use one of the tools to select a set of survey areas.
- Select a field crew and status.
- Click Save.
Sketch in temporary surveys
The Editor widget allows for the creation of Construction surveys and set their status.
- Open the Table of Contents widget and turn on the Construction surveys.
- Open the Create Construction Surveys editor widget.
- Sketch in a new area and update the area's attributes.

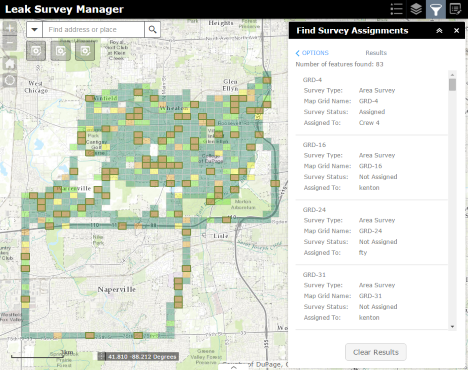
Find surveys by due date
The Query widget allows for the searching of surveys by due date and other critical values.
- Open the Find Surveys Assignments widget and select a survey.
- Enter a date to find surveys due before.
- Click Apply.
- The matching surveys will be highlighted on the screen and presented in a list.