Water Leak Investigator is designed to be used to collect leaks using a mobile device. Follow the steps below to understand the software/application requirements and learn to collect a leak using a mobile device and Collector for ArcGIS.
Software Requirements
To use Water Leak Investigator requires specific software and applications for each field technician in your organization. Below is the software required:
- ArcGIS organizational account
- Collector for ArcGIS
Inventory
Once you have verified that the device you will be using includes the required software and have access to your ArcGIS organization, you can use the Water Leak Investigator map to collect leak in the field.
To collect a leak in the field, complete the following steps:
- Open Collector for ArcGIS and sign in using your ArcGIS organizational account.
- Once signed in, you will be presented with all the maps that you have access to. Search for leak to find the Water Leak Investigator map.
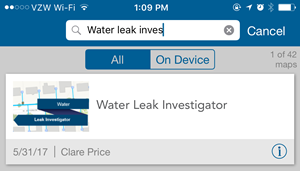
- Select the Water Leak Investigator map's thumbnail to open it. If you have enabled location services, the map will open to your current location.
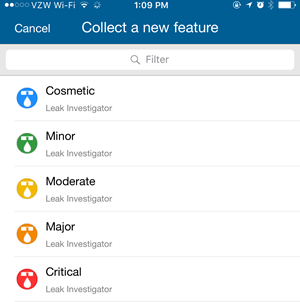
- Collect a new feature, selecting the appropriate leak editing template.
- Update the attributes of the leak.
- Browse to the map and add the location of the asset on the map. If location services is enabled, you can use your current location as the geometry of the asset. You can also add the asset's location by tapping the point on the map.
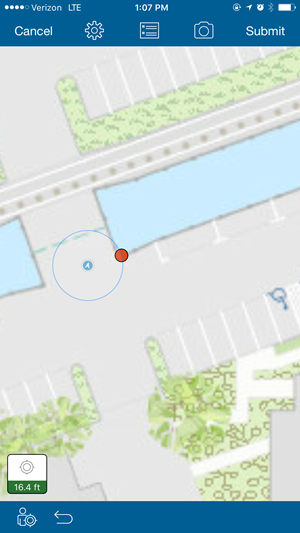
- When you have finished recording the leak's attributes and geometry, click Submit.