In the Leak Logger Analysis solution, the Leak Logger map is used to manage, view, and update the Leak Logger locations. This map is used in a number of applications and throughout the leak logger workflow.
Leak logger map
To create the ArcGIS Online Leak Logger map, complete the following steps:
- Sign in to your ArcGIS organization.
- Create a new map that can be used throughout the leak logger analysis, by completing the following workflow:
- Choose a basemap.
- Add the leak logger results feature service and water distribution network map service.
- Rename and reorder the layers.
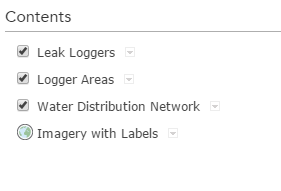
An example of the renaming and reordering of the layers. - Configure the Leak Logger and Logger Areas layers pop-up properties.
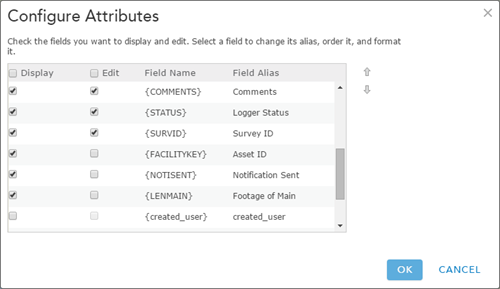
For the leak logger layer, disable editing on the Asset ID, Notification Sent, and Foot of Main fields. - Save the Leak Logger map.
- Disable editing on the Leak Logger Areas layer.
- Share the map with your ArcGIS organization.
-
Browse to the Leak Logger map and edit the item details:
- Title: Leak Logger
-
Thumbnail Image:
- Summary: Map used to manage data from the Leak Logger Analysis solution.
- Description: This map contains the Leak Logger and Logger Area data. This map to update the status of leak logger devices.
- Tags: Leak, Logger, Trace, Water Loss