Configure a Part 1 Crime map and share it with command staff, patrol officers, analysts, and investigators. Law enforcement professionals can then visualize it on their desktop computers and identify where Part 1 crimes are occurring in your community using a configuration of the Basic Viewer application.
Part 1 Crime map
To create an ArcGIS Online Part 1 Crime map, complete the following steps:
- Sign in to your ArcGIS Online organization.
- Create a Command Staff and Law Enforcement Services groups for staff in your law enforcement organization.
-
Create a map for the Part 1 Crime application, by completing the following workflow:
- Choose the Light Gray Canvas basemap.
- Add the PoliceBeats and Offenses layer to the map.
- Configure pop-up for the Offenses layer.
- Save the map as Part 1 Crime Map, then type in tags that describe your map and enter a summary.
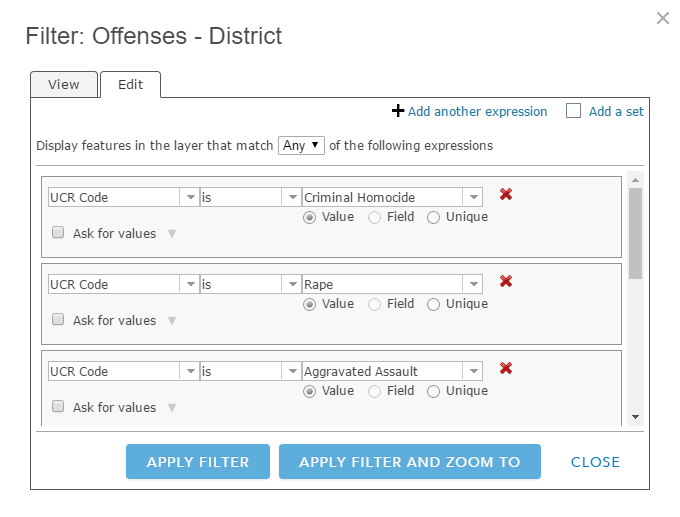
- Apply a filter to the Offenses layer, by using the following filter expressions using UCR codes: Criminal Homicide, Rape, Robbery, Aggravated Assault, Burglary, Larceny, Motor Vehicle Theft, and Arson. When applying the filters, choose to display features in the layer that match Any of your expressions.
- Disable Time Animation Offenses layer.
- Change the transparency on the Police Beats layer to 75%.
- Create a bookmark for each beat.
- Save the map and share it with your Law Enforcement Services group.
- Browse to the Part 1 Crime Map and edit the item details.
Part 1 Crime application
The Part 1 Crime application helps command staff, patrol officers, analysts, and investigators visualize Part 1 crimes in specific police beats. This application can be hosted in ArcGIS Online, or downloaded and hosted on your local web server.
To create a Part 1 Crime application using ArcGIS Online, complete the following steps:
-
Create an app from the Part 1 Crime Map using the Basic Viewer configurable application template. Save the application as Part 1 Crimes and share it with the Command Staff and other groups as needed.
To configure the application, do the following:
- In the General tab, type in a Title and add a Title logo.
- In the Theme tab, choose a Color theme and Title Color.
- In the Toolbar tab, enable Legend and disable Shared Tools and Layer list.
- Click SAVE, then CLOSE once you've finished configuring the application.
- Browse to the Part 1 Crime application and edit the item details.